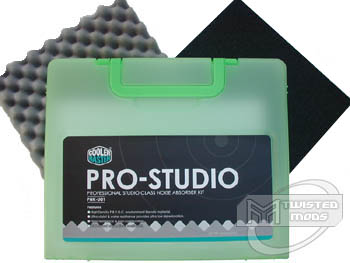
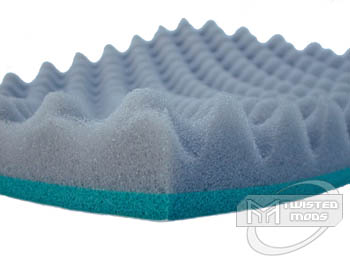
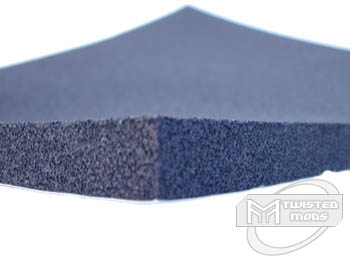
When it comes to noise, I am absolutely disgusted! Hearing the Tornado fans from Vantec at full throttle has got me thinking about nothing but sound absorption! I know that if I ever ran even ONE of those fans in my case, I would be doing all I could to keep my room from sounding like the launch pad on an aircraft carrier. For this very reason, the one and only Cooler Master has created, ?Pro-Studio,? a ?Professional Studio Class Noise Absorber Kit? for your every day pc. As soon as I pulled this product from the shipping package, I was quick to notice the appealing, yet unneeded transparent green carrying case. My only questions is - what would you ever do with this casing after installing the kit? It?s not like you can take the kit off and put it back in the box! Aside from this, I finally opened the casing only to notice an extremely foul odor. The foam in this kit smells equal to, if not worse than those nasty clear rounded cables. Total turn-off! Included with this kit is not only the appealing plastic carrying case, but the thick sound absorber which consists of 1? egg-carton foam and the 1/4? thick black sound insulator. Both pieces are 12? by 9.5,? but have pieces sliced to fit behind 5.25? drive bays, floppy bays and fan holes. If you are un-aware of the difference between sound absorption and sound insulation, let me give you a quick overview before we continue. Sound absorber (grey egg-carton) is most frequently used to ?deaden? any sound waves that may be occurring in the case while the sound insulator is used on thinner parts of the case to harness the sound wave inside the case until it is able to reach the absorber where it is then ?deadened.?
Put Your Mouse Over The Image To See The Product Installed!
According to Cooler Master, ?Finding a strategic position is essential,? (back of fancy case). With this in mind, I simply tore the sliced sections from the absorber and decided that the best place to install this where it would be most effective was on the case panel directly in front of the 80mm heatsink fan. I simply peeled off the wax paper from the back of the absorber, placed the foam on the side panel and made sure the 3m adhesive was effective by pressing the foam down. Next, I tore off the floppy and 5.25? absorber pieces and installed these to the backs of my empty bays. Placement planning was unnecessary for these pieces, obviously because they were made for those bays. That was the end of the sound absorber and onto the insulator. The top of my case, right above the heatsink, was my idea of the best position for this piece. My reasoning is that the carpet below the case will naturally insulate the BOTTOM panel and the side panel is already absorbing, so I took a razor, cut the insulator to fit the top panel and stuck it to the top. I was now left with two pieces of insulation to be used in the covering of empty 80mm fan holes and another piece which was supposed to fit a 92mm fan hole. Since I only had one rear empty fan hole, I installed the 80mm piece there, and decided to throw the other 80mm and 92mm pieces into the front panel of the case to stop any sound from leaking there. Installation was fairly self explanatory. Peel and stick, but it would have been a little nicer to have some instructions with ideas of ?strategic positioning? rather than leaving the user in the dust to find out where it should go. I did however, find the piece of paper inside the case, which mapped out the slice uses, to be fairly helpful wheon twas left with those extra fan pieces. Before reading the paper, I truly had no idea what they were for :(.
Put Your Mouse Over The Image To See The Product Installed!
From start to finish, installation of the kit took approximately 25 minutes including the layout and pulling my case apart. The nice thing I noticed was that I was not required to pull ANYTHING out of my case in order to install this product. Two thumbs up on that right there! I finally had the chance to close my computer?s side panel back up and turn my computer back on. Prior to turning the computer on, I had nothing but high hopes of this product working to the fullest. I was hoping that someone had finally come out with a product that was going to deaden the sound like none other. After turning on the computer and listening with no other sounds in the room, I could notice no difference. I was highly dissatisfied with the performance of the product. To a dB meter, the Pro-Studio kit probably did make a slight difference, but what does that matter if the human ear can not hear the difference? The human ear is going to be the one listening to it! That?s not all folks. Let?s move on to temperatures. At the time of testing, the room temperature was a constant 70.5F. Prior to installing the Pro-Sound Kit, I measured the case temperature with my Digidoc5 and it measured in at 78.6F. After installation of the Pro-Sound Kit, the case temperature (thermometer in exact same spot) measured in at 80.5F. Although a 1.9F rise does not seem like much to some people, but 1.9F is entirely too much after witnessing a ?dead? product. Once again, the Pro-Studio unfortunately fails.
Since the Pro-Studio had no effect on my computer?s acoustics, I no longer had a use for it. It was time to uninstall, but wait ? it gets better! That 3m adhesive which seemed so impressive before installation had become a nightmare! I tried pulling every which-way, using a putty knife to scrape off the foam/glue, but it wouldn?t budge! It left that gross, torn away foam residue everywhere the foam was stuck. I had no idea what to use to get rid of this product effectively and since Cooler Master had forgotten the instructions, I was left in the darkness once again. I guess the only thing I can do now is create some sort of shape that cuts out the spot with glue and turn this case into a modded computer. I guess that?s not so bad after all.
After this eventful product experiment, I am left speechless. The only thing I can say is that I am glad Cooler Master won?t be sound proofing anything I own in the future! Although some of the ?strategic placement? which is ?essential? may have been somewhat of a user error, I would blame this on Cooler Master for not including Instructions. The only thing left that I have to say about this product is that TwistedMods does not recommend this product for any use, but if you wish to give it a whirl yourself, you can pick it up from PhamComputer.com for $19.99 and maybe you can find a nice use for the pretty green case ;).
TwistedMods.com Does Not Recommend This Product


