WARNING: Pictures in this review are somewhat hard to make out. We were having a difficult time seeing as the entire case is clear. Enjoy!

Walking into a LAN party, large or not, has often me puzzled as to why so many people would buy premodded cases. Not only this, but the cases that were modded by the user have just plain, rectangular windows. Premodded or not, windows in general are just about the most outplayed mod currently. To many of us, a mod is not a mod without a window?sorry to disappoint you, but you?ve all been misled! A new chassis manufacturer known by the name of BeanTech says the hell with windows, what about making the WHOLE CASE from a window? Today we are giving you an up-close and personal look at BeanTech?s new BT-80 Crystal Clear Acrylic Medium Tower case. Before I received the case, I attempted to find background information on the product but was unable to find anything! From the pictures attached to BeanTech?s email however, I was able to tell that this case is composed of 100% Acrylic (other than the screws) which I was very impressed with already. Many acrylic chassis? have complete Acrylic construction and are finished off with a rear I/O plate composed of steel. Just from pictures, I was excited to review this product because of their attention to detail -considering even their I/O plate was made of acrylic!
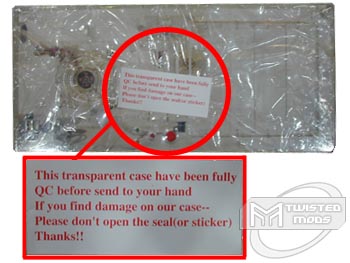
After a short wait, I received the BT-80 in a HUGE cardboard box. The cardboard box alone is probably twice the size of a normal mid-tower chassis, which hinted me that this case was pre-assembled. Often times, including the previously reviewed Acrylic chassis here at TwistedMods, Acrylic Chassis come unassembled and require user assembly with the included hardware. Not only does this leave the user to figure out how to construct the box, but leaves the user to blame when something on the box goes wrong. BeanTech is so confident with their construction that they have no problem sending the BT-80 pre-constructed. After I opened up the enormous box and pulled the chassis from it, I gave it a quick glance to make sure all parts were intact before beginning the review. I am not sure what this following line has to do with the review of the product, but I found the sticker pictured above to be extremely funny! The broken English on this sticker had me laughing for a couple of minutes not because of the poor translation itself, but because of what it said. ?If you find damage on our case ? please do not open the seal (or sticker).? First of all, it would now be MY case, not theirs and second of all, how would I go about finding damage on the case through a clear plastic bag? With this in mind, I broke the seal to the shipping bag and pulled the chassis out. I was very impressed at first with this case. Not only did BeanTech combine good looks with an awesome amount of fans, but this chassis is rock solid. As many of you may know from previous chassis reviews, I perform the strength test of a chassis by simply placing all 115lbs of sheer muscle on top of the case as I jump up and down like a huge dork in hopes of feeling any unsteady construction, weak panels or just plain horrible construction. In the case of the BeanTech BT-80, I was completely impressed. After a good minute of bouncing up and down on the top panel I could feel the top ?? acrylic panel flexing, but this was expected. I am surprised to report that absolutely NOTHING on this case became loose, broken or permanently dented in my attempt to test strength. The weight of this case on my home scale is about 19lbs which is considerably light for a chassis, in fact, very close to that of an all aluminum chassis which makes this a great LAN party solution.
 ?????
?????

Moving along to the front end of the chassis, I was not too ?hyped? about this. I mean, the construction and looks are top notch at this point, but there?s only so much you can do with an acrylic front, no real shaping, forming etc. Just a plain old box! The edge around the front panel of the chassis, however, is nicely beveled at about a 45degree angle to give it more of a form and move away from the boxy look. To give you a slight idea of this case?s size, using a tape measure I found this chassis to be 17.5? Tall, 8? Wide and 19.5? deep ? very close to the measurements of a standard mid-tower chassis. From the FRONT panel of the BT-80, I quickly did notice the 80mm intake fan, which was properly placed to suck outside air into the case right through the hard drives (great idea if you run SCSI drives especially!). The one thing however that really degraded this fan, as well as all the fans on this case, is the horribly restrictive intake holes! BeanTech make the cutout for these fans so restrictive that when the front intake is turned on, airflow is very weak. Externally accessible are four 5.25? bays as well as the two 3.5? bays. To the right of the 3.5? bay, you will notice the power and reset buttons, power LED, and hdd activity LED (from top to bottom). I was very impressed how BeanTech paid attention to the small detail by beveling the holes to the power and reset buttons, and this made it very appealing. The power button, as you can see from the picture, is very nicely sized for anyone?s finger, but the reset button on this chassis is so small that I was barely able to utilize it even with my pinky fingernail. The last thing that I noticed with this chassis is the rare front access panel. Unlike many acrylic and even steel/aluminum chassis? a front access panel is a rarity, and often underestimated. While I am not the type to use this kind of option, many people find the option to plug USB and Firewire devices into the front of a case adds a TON of functionality to a case?especially if you are tired of crawling under your desk to plug in the Firewire cord for your video camera :). While this does sound like a luxurious add-on, first you must make sure that your motherboard has both Firewire and USB capabilities, and then you must have the manual in order to plug the front access ports in?pin by pin, which is completely discouraging if you have lost your motherboard?s manual.
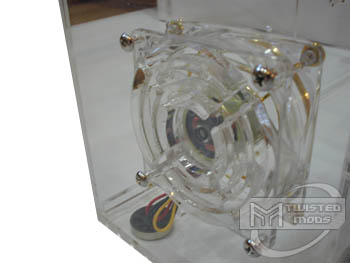
A poorly layed out exhaust on the sidepanel.
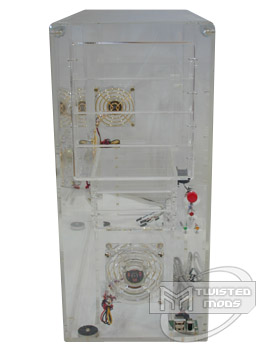
Moving to the inspection on top and side of the chassis, a quick glance before detailed inspection left me a bit weary. I will start off by saying that BeanTech could have spent a little more time working on the rounded edges which join the top and side panels. I can see a VERY noticeable rough edge which totally degrades the looks on this chassis, which can be easily fixed by the user with the use of either a torch or very FINE sand paper. I do appreciate BeanTech?s attempt to make the corners of this chassis appealing, however. Aside from that, the top panel is very straight forward, a simple ?? piece of acrylic secured to the rounded joints by screws. On the left side panel however, I immediately noticed the second (of three) 80mm fans which in this case, was an exhaust. The thought of making a side panel exhaust as stock is a very nice add-on, but the fact that the placement in the center of the panel makes this useless, unless they wanted it to be sucking air from the RAM. If they would have taken a little more time to think about the placement of this fan, they would have found that by flipping the fan around, turning it into an intake, and placing it in front of the CPU OR the PCI slots would have allowed for better overclocking of either the chip or the graphics card, depending on which placement they chose. Again, the fan cutout for this fan was VERY restrictive; the first thing I would do to this case is cut out the fan grills and replace them with wire ones to increase airflow by a TON.

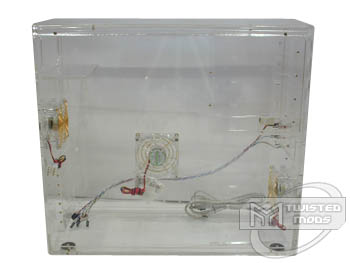
I had to place a towel on the inside for this shot in order to see the clear I/O Plate on the rear.
Moving to the rear of the BeanTech BT-80, this is where I was most impressed. I noticed the usual PSU mount on the top of the rear panel as well as the standard 80mm Evercool exhaust fan (which had the restrictive cutout as well). While this was all a standard for most chassis?, I was most impressed with the rear I/O panel. Almost all other I/O plates I have seen on an all acrylic case are metal, which totally degrades the looks of the case overall. BeanTech thought ahead on this one and created an ALL acrylic I/O plate constructed of what seems to be 1/16? acrylic (VERY thin). On this I/O plate are the 7pci slots as well as room for your mouse, keyboard, USB, onboard LAN, parallel, audio and serial ports. The only thing I don?t like about this rear panel is the fact that once you use a knife to cut out the pre-punched shapes, there?s no way to replace them with acrylic fillers again?so plan ahead and make sure you cut out the PCI plates you KNOW you will use! One more thing that I noticed is that the PSU cutout is not removable as seen on many Lian Li Aluminum Chassis. This means that you must take extra precautions to not accidentally drop the PSU onto the heatsink (assuming the motherboard and CPU are already installed). Another design flaw I noticed is that the little 3.5? shelf that helps hold the PSU up from underneath conflicted with the 80mm grill on my Enermax PSU.
 ?????
?????
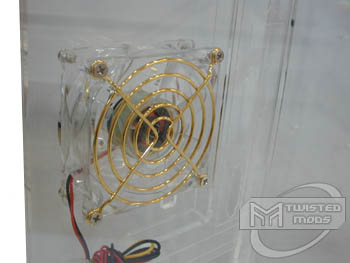
Moving to the last part of the chassis, the INSIDE, the first place to start is removing the side panel. To remove the ?? side panels and top panel of the BT-80, simply pull out your Phillips screwdriver and unscrew each of the screws in each corner of the panel ? this isn?t exactly user friendly for LANs since you may have to carry a screwdriver around everywhere, but you can?t expect the chassis to be perfect right?! After I removed the screws to the left side panel, I was interested in how they actually threaded the acrylic, come to find out, BeanTech actually planted little steel threads into holes drilled in the acrylic which hold the panel in place exceptionally well. Being an extremist, I had to test out the strength of the threads on the screws and planted threads, so I put the panel back in and screwed it back in place as HARD as I could?no joke. I am VERY proud to report that not only did the screw/threads not slip what-so-ever, but the acrylic panel didn?t crack at all. Ok, so back to the inside ? I removed the side panel (which was a pit tricky with no handles) and took a look inside. Starting off with the fans, I did notice very attractive gold fan grills on the backside of the fans, although I am not real fond of the steel screws outside + gold grills. Starting on the inside, towards the front, aside from the four 5.25? bays and two 3.5? bays previously mentioned, I was able to notice room for five additional hard drives. This is way more than I will ever use! As I suspected near the beginning of the review, the pins for the USB and Firewire ports (accessible from the front) are all individually wired. The next thing that caught my eye, rather quickly I might add, was the fact that BeanTech already put split loom over the Power/Reset/Front LEDs which already adds a great amount of cleanliness to the chassis. Moving on to the Motherboard mounting panel inside the case, I was impressed to see all the holes for everything from a Full-Sized server motherboards to Mini-ITX already drilled, but was concerned to see that the actual motherboard standoffs are made of plastic as well. I am not exactly one that is smart with EMI and EMD (Electro-Magnetic-Discharge), but a good guess says that a motherboard on this case would not be grounded correctly aside from the ground on the actual ATX connector of the PSU. As far as mounting PCI devices in the rear of the case, BeanTech once again saved themselves with those implanted steel threads with which you would secure the PCI devices.
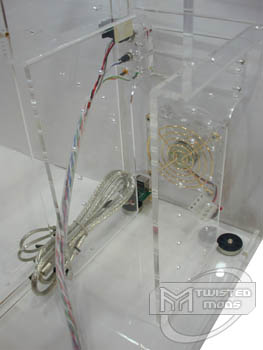
Very poor intake/exhaust holes...hard to tell, but these are VERY restrictive to airflow
After covering the numerous good features of the BT-80 as well as the design flaws, you may be having mixed opinions at this point, allow me to explain further some advantages to acrylic cases and then give the final word. No matter which acrylic case you may decide on, the fact remains that it is nearly impossible to hide ALL wiring. Keep this in mind as well as the fact that acrylic does scratch easily, so keep the box for transporting it! To prove my point, I took a penny to the bottom side of the case and with a fair amount of pressure, was able to leave a nice scratch. Aside from this, advantages of any acrylic case include the fact that you will have something different from the normal metal chassis and window. Also, if you are good with wiring, an acrylic case really allows you to show it off by seeing EVERYTHING. Many of the design flaws with BeanTech?s BT-80 are simply resolved with the use of a Dremel which would not keep me from recommending it. A nice Dremel bit will allow you to cut out the restrictive fan grills as well as cut part of the 3.5? shelf which supports the bottom of the PSU and conflicts with the internal fan. Since this case remains unreleased at this point, no price has been given, but with any acrylic case, be prepared to pay a hefty price! One more thing you may want to check into before buying this case is the amount of Electro-Magnetic-Interference caused by the acrylic construction as well as the plastic leads.

Next Page 2/2 >


