|
Thermalright ALX-800 Heatsink
Page: 1/1 Manufacturer: Thermalright Product Name: ALX-800 Heatsink Provider: HeatsinkFactory.com Review Date: 12.01.03 Reviewer: rosko486
Specifications
The heatsink itself feels very solid and heavy. The base is made out of copper and is formed into the shape of a trapezoid. This shape is one feature that Thermalright claims is what contributes to the ALX-800?s cooling abilities. The fins of the heatsink are made of aluminum to make the heatsink lighter and are said to be super thin at one millimeter to provide more surface area. There are exactly thirty two of these fins. Upon inspection of the heatsink, I noticed that one of the fins was actually bent to the side as shown in the above picture. Also included is the black locking clip used to hold the heatsink to the CPU socket. 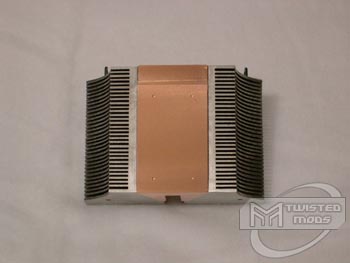 ????? ?????
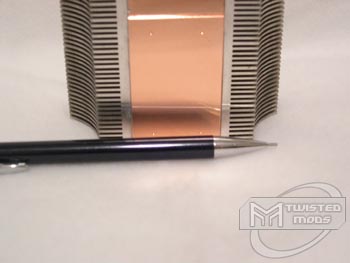 Looking more closely at the copper base, it appears very smooth to the naked eye considering it's a factory finish. When I ran my fingernail across the bottom, I could feel the slightest ridges but nothing to worry about. As you can see in the picture, the reflection of the pencil is only a little distorted which indicates a fairly smooth surface. The parts that aren't smooth will be compensated for by the thermal paste provided. 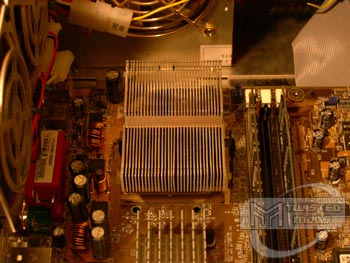 ????? ?????
 Installation of the heatsink is as simple as any other average heatsink installation. The first step was to remove the old heatsink which I would hope was the most obvious step. Then one would need to clean off the processor core. Next, you would need to peel the protective sticker off of the bottom of the new heatsink. What someone would do next is nothing I have experienced yet in heatsinks in that I have never used this type of design. The copper base of the heatsink is to narrow to span the gap between the pads on the processor. In order to get around this small detail and not put all of the weight on the processor core, the four felt pads I spoke of earlier are placed on the bottom of the base where their spots are marked by indentations in the copper. From that step on, installation is fairly straight forward. Installation of the fan is comprised of just placing the fan on the heatsink and installing the clips. For testing, I will be comparing the ALX-800 with a Cooler Master Aero 7+ and the stock AMD processor that comes with the heatsink. The ALX-800 used a Panaflo 80 millimeter High Output fan, the Aero 7+ used the stock fan and the stock AMD heatsink also used the stock fan. The system that I will be testing these heatsinks on is comprised of the following: The test was allowing the system to sit at idle for a minimum of thirty minutes and then recording the temperatures and then running SiSoftware Sandra?s CPU Burn In for a minimum of thirty minutes on each heatsink and individual fan setting and then the temperature was recorded.  In conclusion, the ALX-800 is the best heatsink I have ever used. It provided me with the lowest temperatures of all of the heatsinks I tested. After testing the ALX-800, I would recommend it to anyone who uses air cooling and wants considerably low temperatures. The heatsink is good in the fact that it provides normal users with good, stable temperatures that will in turn increase the life of your processor as well as provide the more extreme users with a considerably large overclocking horizon. Be sure to get your hands on one quick because they will be going fast.  |
||||||||||||||||||||||||||


 ?????
?????