|
Logisys Pre-Assembled Clear Acrylic Case
Page: 1/1 Manufacturer: Logisys Product Name: Pre-Assembled Clear Acrylic Case Provider: Xoxide.com Review Date: 06.14.04 Reviewer: DjRima Thanks to
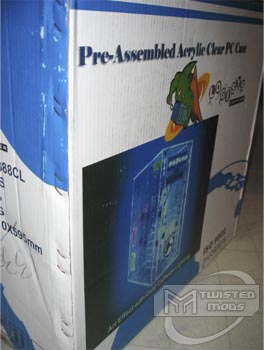
The box itself has the standard Logisys logo and a shot of the acrylic case that lies inside it. The specs on the box are as follows:
Inside the box, the case was packaged very nicely in four layers of wrapping. First, Styrofoam held the wrapped PC case securely in the box. Next, a layer of bubble wrap covered the case. Then a layer of clear plastic; and finally a sticky thin layer of clinging plastic over all of the acrylic so no blemishes would occur during shipping. 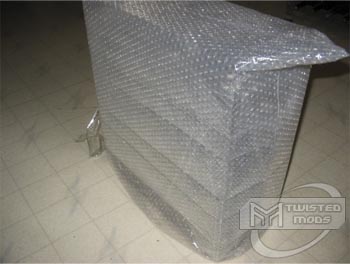 ????? ?????
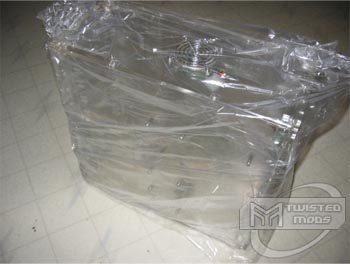
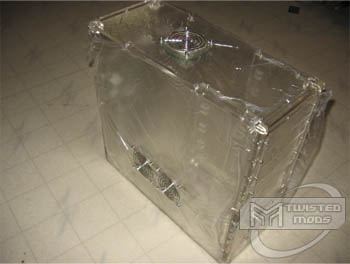 ????? ?????
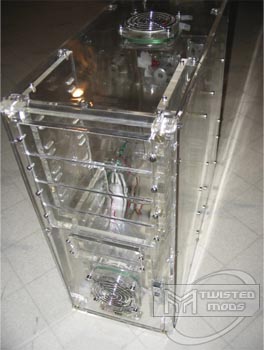 Wow, all that packaging really kept the case looking brand new and perfect even after taking a beating when being shipped. Right off the bat some things I noticed really troubled me. It appeared there were over ten screws on each side panel just to remove it! I also did note that the acrylic was extra thick and it looked very sturdy. There are also five 80mm fans with standard wire grills. There is one fan in the front and two on the side of the case for intake, and one in the back and a blowhole on top for exhaust. This is a fairly impressive fan placement for an acrylic case and the airflow looked promising. Aside from the 80mm fan, the front of the case has four 5.25? drive bays and two 3.5? bays. The power button and reset button are small silver rectangular buttons on the lower right side of the front. There is also a power LED and a HDD LED, which comes standard with most ATX cases. To my disappointment, at closer examination, the side panel did require twelve screws to remove it! I already knew that this case would not work well for people that open up their cases a much as I do. The back had a standard IO shield and a hole for the PSU. I also noticed that the case would make a great pair with the Logisys Clear Acrylic 2.1 speakers. 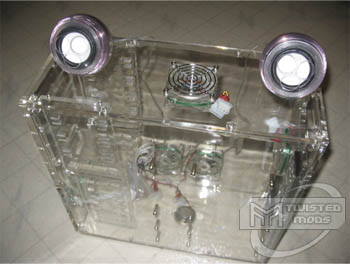 Now we will take a closer look at the inside of the case and test the ease of hardware installation. 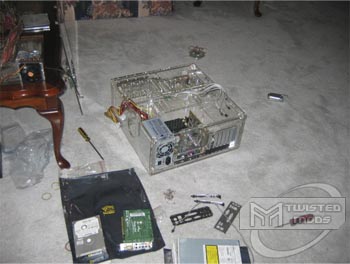 It took me about 2 minutes just to get the side panel off, twelve screws! After taking the side panel off I saw that there were motherboard mounts pre-installed on the back panel. Another disappointment, if the other side panel was needed to be taken off, it require taking off the entire motherboard with it. Other acrylic cases have already solved the issue with the large number of screws and motherboard mount tray and Logisys failed to realize the importance of easy interior access.  I installed an Intel D865GRH micro ATX motherboard. Since it is a micro ATX board, there was plenty of extra space at the bottom of the case. The tall mounts made it easy to set the motherboard down and screw it on to the panel. This case does not come with a power supply though, so I purchased a Raidmax 350watt with dual fans. I later found out that the top fan for this case would be in the way of the front fan on the power supply, so I had to remove that 80mm fan that came on the top of the case. This is a bad design by Logisys, dual fan power supplies are very common and it is such a disappointment that they did not take the measurements of the fan placements into consideration with various power supply units. Once installed the power supply drooped badly because four screws, in the back, only held it on! What were they thinking? After installing the motherboard and power supply, I connected the power, reset and hard drive LED wires to the motherboard. With this case, the wires were a flat ribbon of grey instead of the standard blue, orange, red and green wires. This was a nice touch because the case is all clear, since every single cable inside will be visible. Next came the CD ROM drive. The clear bezel that comes with the case requires a flat head screwdriver to remove it. Again, the little things like having to use more than one tool during installation is a factor that made this case annoying to work with. The case also only came with enough screws to install the motherboard and one CD ROM drive. So I had to scrounge up some mismatched screws to get the CD burner and floppy drive installed, which was a big hassle. With the CD ROMS, floppy disk and all IDE cables installed, I hit the power button. The five fans shone red, green and blue. An interesting color combination but it looked cool nonetheless. 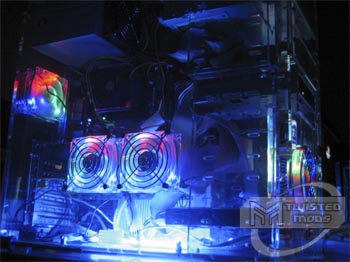 With the system, completely working the case looked pretty nice. I threw in a cathode at the bottom and it lit up the entire clear case. With all the fans humming, I opened up Motherboard Monitor and to my surprise the 3.2 GHz CPU that I installed was running at a low 30C. A few settings in the BIOS and it was running at 3.6 no problems at 35C idle. The cases stock cooling is phenomenal. The two side fans along with a front intake and rear exhaust fan pushed serious air straight through the case, cooling all the vital components nicely. Keep in mind this is even without the top blowhole fan, the cooling would have been even better! The noise level is exactly what I had expected from 5 80mm fans and two 80mm fans on the PSU. It is loud, but not obnoxiously loud, and if you are the type that cannot handle a lot of CPU noise, there is always a fan controller. This case definitely has more low points than high. The reset button broke after pressing it once and needed to be re-soldered. There is no motherboard tray, the top blowhole fan gets in the way of some standard power supplies, there is a ridiculous 12 screw removal process to get ONE panel off, it comes with ugly multicolored fans, and only four screws hold on to the back of the power supply providing no support or equal weight distribution which makes the PSU sag down in the front. If it weren?t for the great packaging, nice thick acrylic and excellent airflow this case would be doomed. Nevertheless, there is no excuse for all the flaws and annoyances that this case has. Here is a shot of the case with a sleeved power supply, PSU mod and custom fan grills. 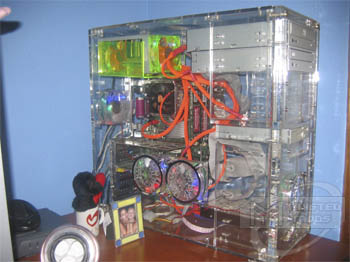
 |
|||||||||||||||||||||